Ubuntu 24.04 LTS ‘Noble Numbat’ is now officially supported and available from our installer menu. Current customers should note that the installer menu option will wipe your existing data to perform a clean install. It is also possible to perform an in-place upgrade with apt – note that you should add ‘net.ifnames=0’ to the Linux kernel command line (set in grub.cfg) otherwise your network interface will change name from eth0 to enX0.
openSUSE VPSes now supported
We’ve added official support for openSUSE. You’ll find an option for openSUSE Leap 15.5 in the installer menu. Note this will wipe your current filesystem.
Posted in Uncategorized
Leave a comment
Debian 12 ‘Bookworm’ VPSes now available
Debian 12 ‘Bookworm’ is now officially supported and available from our installer menu. Note that the installer menu option will wipe your existing data – let us know if you’d like to attach an additional new disk image to do a clean install to while temporarily keeping your old disk image to transfer data from. We’ve recently added an ‘altboot’ command to the vpsconsole allowing you to choose which disk image to boot from, which assists this process.
It’s also possible to perform an in-place upgrade from within your VM, with the usual risks from configuration, compatibility and software availability changes that come with any distro upgrade. Let us know if you plan to upgrade from Debian 10 ‘Buster’ since we might need to switch your VM mode from PV to PVH.
Posted in Uncategorized
Leave a comment
Ubuntu 22.04 VPSes now available
Ubuntu 22.04 LTS ‘Jammy Jellyfish’ is now officially supported and available from our installer menu. Current customers should note that using the installer menu option will wipe your existing data to perform a clean install. It is also possible to perform an in-place upgrade from within your VM, with the usual risks from configuration, compatibility and software availability changes that come with any distro upgrade. If you’d like to upgrade from 18.04 ‘Bionic Beaver’ then please contact support as we’ll need to switch your VM mode from PV to PVH.
Posted in Uncategorized
Leave a comment
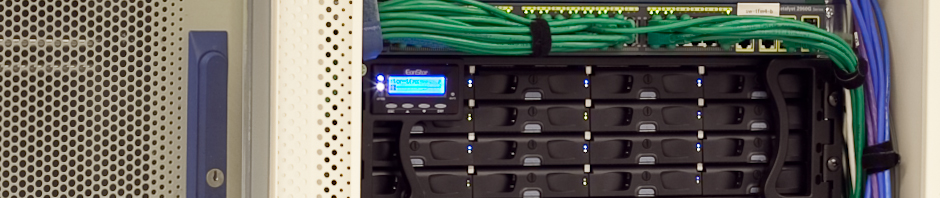
Building energy efficient servers
At Jump we really like energy efficient servers. We try to encourage our customers to choose power-friendly hardware, so much so that in 2008 we changed our pricing scheme to do away with a per U or per server charge, and charged purely based upon power usage (in VA, metered at idle).
Always on the lookout for well featured power friendly hardware, my current favourite picks are offerings from Supermicro – one can mix and match components so that hot swap drive bays are available even on very small systems, and the IPKVMS (Remote over IP Keyboard Video Mouse and Storage) feature only costs around an extra £15, compared to several hundred pounds from some vendors, and Intel NICs save frustrations with operating systems which don’t include binary firmware blobs in their default installers.
With criteria of IPKVMS, sandy bridge, hot swap drive bays, and 80plus gold or better PSU, the following options are all interesting.
Jump isn’t generally in the business of hardware building or sales, although we occasionally do do this for customers, so I’ve chosen to link to and give prices from http://www.lambda-tek.com , who we have no affiliation with, and the prices are just a snapshot as of 2012-03-02, but they offer mostly the best prices I’ve seen, and are able and happy to supply Supermicro kit without opening a trade account with them. Where they’re more than a few pounds more expensive than other suppliers for a given component I’ve mentioned it.
A build will consist of a chassis, motherboard, CPU, heatsink, RAM, and HDDs. I’ve not considered HDDs here, and I’ve only considered the X9SCL+-F motherboard, which features IPKVMS and two traditional Intel GigE ports (so no need for particularly new kernels to support the NICs). I’ve only considered the smallest and largest reasonable RAM options, it is possible to use 32GB RAM, but the price is astronomical right now.
Motherboard: £139.44 X9SCL+-F
Heatsink: £20.20 SNK-P0046P (£6 cheaper elsewhere)
CPU, one of: (Cores / Threads / Frequency / Max Turbo / Range)
£24.85 G460 (1/2/1.8/na Celeron)
£31.14 G530T (2/2/2.0/na Celeron)
£48.55 G620T (2/2/2.2/na Pentium)
£46.10 G630T (2/2/2.3/na Pentium)
£84.90 i3-2100T (2/4/2.5/na Core i3)
£84.22 i3-2120T (2/4/2.6/na Core i3)
£127.53 E3-1220L (2/4/2.2/3.4 Xeon E3)
£189.03 E3-1260L (4/8/2.4/3.3 Xeon E3)
RAM, options include: (takes up to 4x unbuffered DIMMs)
£8.81 CT12872BA1339 (1x 1GB DIMM)
£42.92 CT2KIT51272BA1339 (2x 4GB DIMMs)
Chassis, one of: (* denotes Supermicro uses one of these chassis in Superserver with X9SCL motherboard / hot-swap drive bays / chassis depth / PSU)
£110.02 CSE-510T-203B 2x 2.5″ / 287mm / 80plus gold
£196.95 CSE-111LT-330CB * 4x 2.5″ / 558mm / 80plus gold (£30 cheaper elsewhere)
£201.01 CSE-113MTQ-330CB 8x 2.5″ / 508mm / 80plus gold
£378.80 CSE-113TQ-R500CB 8x 2.5″ / 597mm / 80plus platinum redundant
£179.11 CSE-813MTQ-350CB * 4x 3.5″ / 503mm / 80plus gold
£343.55 CSE-813MTQ-R400CB * 4x 3.5″ / 503mm / 80plus standard redundant
An entry level 510T-203B chassis, motherboard, heatsink, G460 CPU, 1GB RAM, comes to £303.32, just add disks.
Higher end, 813MTQ-350CB, motherboard, heatsink, E3-1260L CPU, 16GB RAM, comes to £613.62, this, plus a pair of enterprise HDDs, is what we’re using for our dedicated server hardware – and meters at 39.6VA, 176mA@231V, 31.6W, PF0.78 (with no disks, booted into Ubuntu 10.10 server).
Edited 2012-03-06:
Remove G440 CPU link (no support for speedstep so higher idle power)
comparison of above CPUs
Added max turbo boost frequencies to CPU table
Posted in Uncategorized
1 Comment
Configuring ZFS auto snapshot destroy thresholds
A feature of ZFS automatic snapshots is automatic cleanup of snapshots when disk space is ‘low’. 95% full is considered an emergency, and all snapshots are purged, which probably isn’t desired with several TB free!
The following will appear in /var/adm/messages
Sep 21 05:24:49 host time-sliderd: [ID 702911 daemon.crit] tank exceeded 90% capacity. Weekly, hourly and daily automatic snapshots were destroyed
Sep 21 05:24:49 host time-sliderd: [ID 702911 daemon.notice] 43 automatic snapshots were destroyed
and later
Sep 22 06:18:40 host time-sliderd: [ID 702911 daemon.emerg] tank is over 95% capacity. All automatic snapshots were destroyed
Sep 22 06:18:40 host time-sliderd: [ID 702911 daemon.notice] 758 automatic snapshots were destroyed
Warning level exceeded: Destroy hourly and daily snapshots, oldest first, until threshold no longer exceeded.
Critical level exceeded: Also destroy weekly snapshots, oldest first, until threshold no longer exceeded.
Emergency level exceeded: Also destroy monthly snapshots, then frequent (15min) snapshots, until threshold no longer exceeded.
We can view the current thresholds as follows
root@host:~# svcprop time-slider | grep level
zpool/critical-level integer 90
zpool/emergency-level integer 95
zpool/warning-level integer 80
And change the thresholds as follows:
svccfg -s time-slider setprop zpool/emergency-level=99
svccfg -s time-slider setprop zpool/critical-level=98
svccfg -s time-slider setprop zpool/warning-level=97
svcadm refresh time-slider
References:
http://arc.opensolaris.org/caselog/LSARC/2008/571/proposal.txt
http://www.stormsail.com/2009/07/06/opensolaris-and-time-slider/
Posted in Uncategorized
Leave a comment
Configuring Cisco Easy VPN Server and Client on ASA 8.4 with Network Extension Mode and Split Tunneling
This is an example of a clean Easy VPN (EzVPN) Server configuration with Network Extension Mode (NEM) and Split Tunneling, for Cisco ASA software version 8.4. The Cisco website has some more sample configurations, but they tend to be entire device configurations, rather than just the changes that need applying from a clean or existing device configuration, and they haven’t been updated since the NAT configuration changed in ASA 8.3, which makes no nat configurations incompatible with earlier versions.
This has been tested on a pair of Cisco ASA devices running software 8.4(2), on the ASA5505 with base licence (part number ASA5505-BUN-K9, available for about £185+VAT new from reputable places).
Sections in bold are ones you will almost certainly need / want to change for your specific configuration.
Sections in italics show that the name has been chosen by myself, and could be changed in your configuration, as long as you’re consistent and change every occurrence of that name.
EASY VPN SERVER SIDE
====================

!=== A clean start ===
configure factory-default 192.168.80.1 255.255.255.0

!=== Generic Basic config ===
hostname easyserver
interface Vlan2
 ip address 192.0.2.2 255.255.255.0
route outside 0.0.0.0 0.0.0.0 192.0.2.1 1
!-- Optional - allow pings outbound
policy-map global_policy
  class inspection_default
   inspect icmp

!=== IPsec configuration ===
crypto ipsec ikev1 transform-set MapOutsideDynamicXform esp-aes-256 esp-sha-hmac
crypto dynamic-map MapOutsideDynamic 5 set ikev1 transform-set MapOutsideDynamicXform
crypto map MapOutside 60 ipsec-isakmp dynamic MapOutsideDynamic
crypto map MapOutside interface outside
crypto ikev1 enable outside

!=== Group / tunnel policy and logins ===
group-policy easyvpnclientpolicy internal
group-policy easyvpnclientpolicy attributes
 nem enable
username eznemuser1 password eznemuser1pass
tunnel-group eznemgroup type remote-access
tunnel-group eznemgroup general-attributes
 default-group-policy easyvpnclientpolicy
tunnel-group eznemgroup ipsec-attributes
 ikev1 pre-shared-key eznemgrouppass

!=== No NAT within our own extended network ===
!-- This is necessary otherwise the default PAT rule will cause
!-- RPF failures and easyclient network won't be able to access
!-- the easyserver network, and easyserver network access to
!-- easyclient will be subject to PAT.
object network clientnet
 subnet 10.67.66.0 255.255.255.0
object network servernet
 subnet 192.168.80.0 255.255.255.0
nat (inside,outside) source static servernet servernet destination static clientnet clientnet no-proxy-arp route-lookup

!=== For tunnel all clients to obtain Internet access ===
!-- If you want to tunnel everything, use this section, not the
!-- one below. This might be useful if the easyclient is on
!-- an ISP which tampers with traffic to the internet, but the
!-- easyserver is on more desirable connectivity.
object network clientnet
 nat (outside,outside) dynamic interface
same-security-traffic permit intra-interface

!=== For split tunneling ===
!-- You don't need the section above if you use this one. It
!-- causes only traffic to the networks listed below to go
!-- over the VPN, other traffic to the Internet uses the local
!-- ISP of the easyclient.
group-policy easyvpnclientpolicy attributes
 split-tunnel-policy tunnelspecified
 split-tunnel-network-list value SplitTunnelNetworks
access-list SplitTunnelNetworks standard permit 10.0.0.0 255.0.0.0
access-list SplitTunnelNetworks standard permit 172.16.0.0 255.240.0.0
access-list SplitTunnelNetworks standard permit 192.168.0.0 255.255.0.0
In contrast, the client side is much easier
EASY VPN CLIENT SIDE
====================

!=== A clean start ===
configure factory-default 10.67.66.1 255.255.255.0

!=== Generic Basic config ===
hostname easyclient
interface Vlan2
 ip address 198.51.100.2 255.255.255.0
route outside 0.0.0.0 0.0.0.0 198.51.100.1 1

!=== Easy VPN Client ===
vpnclient server 192.0.2.2
vpnclient mode network-extension-mode
vpnclient nem-st-autoconnect
vpnclient vpngroup eznemgroup password eznemgrouppass
vpnclient username eznemuser1 password eznemuser1pass
vpnclient enable
Posted in Uncategorized
Leave a comment